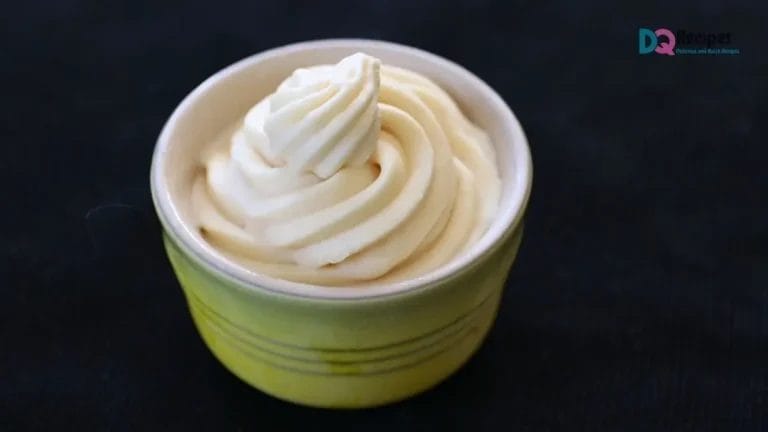
If you’ve ever craved that creamy, dreamy Dairy Queen Soft Serve Ice Cream recipe at home, you’re in for a treat. The best part? You only need two ingredients to recreate this magic-no fancy stabilizers, no long list of hard-to-find items. Just pure, rich, velvety soft serve with a little bit Dairy Queen Hot Fudge over it in your own kitchen.
What makes this recipe special is that you don’t even need an ice cream machine. But if you have one, the process becomes even smoother. Either way, the results are guaranteed to be delicious.
This recipe is keto-friendly, sugar-free, and has been a crowd-pleaser among my family and friends. Trust me-you’ll love how easy it is to whip up a healthier, homemade version of this iconic frozen dessert.
My Personal Experience With This Dairy Queen Soft Serve Ice Cream Recipe
The first time I tried making this Dairy Queen soft serve ice cream recipe, I was skeptical. Could two ingredients really give me that authentic creamy texture I love from DQ? To my surprise, the results were better than I imagined.

Every time I serve it at family gatherings, I get the same reaction: “Wait, you made this at home?” That’s when I knew this recipe was a keeper. It’s rich, smooth, and full of flavor, without the unnecessary additives.
Now, it has become a weekend favorite in my house. I love experimenting with different toppings-sometimes a drizzle of sugar-free chocolate, sometimes just a sprinkle of nuts. It’s versatile, delicious, and a guilt-free indulgence.
Ingredients Required for Dairy Queen Soft Serve Ice Cream Recipe
Gather all the following ingredients, before you start making this Dairy Queen Soft Serve Ice Cream
- 2 cups chilled heavy whipping cream
- 1 batch sugar-free sweetened condensed milk (room temperature)
- Sugar-free chocolate syrup
- Chopped nuts or berries
Kitchen Utensils Required
- Mixing bowl or stand mixer
- Spatula
- Freezer-safe container with airtight lid (or loaf pan + cling wrap)
- Optional: Ice cream maker
- Optional: Piping bag with decorative tip
Preparation & Cooking Time
Preparation Time: 10 minutes
Chilling Time: 1–2 hours for soft serve, 3–4 hours for scoopable, overnight for hard set
Total Time: 1 hour 15 minutes – 4 hours (depending on texture preference)
Copycat Dairy Queen Soft Serve Ice Cream Recipe
Just follow this simple step by step guideline to make your homemade version of Dairy Queen Soft Serve Ice Cream in a delicious way.
Step 1 – Whip the Cream:
Pour 2 cups of chilled heavy whipping cream into a mixing bowl or stand mixer. Whip on medium speed until it reaches a soft-to-medium stiffness. Be careful not to overwhip, as this can turn the cream into butter.
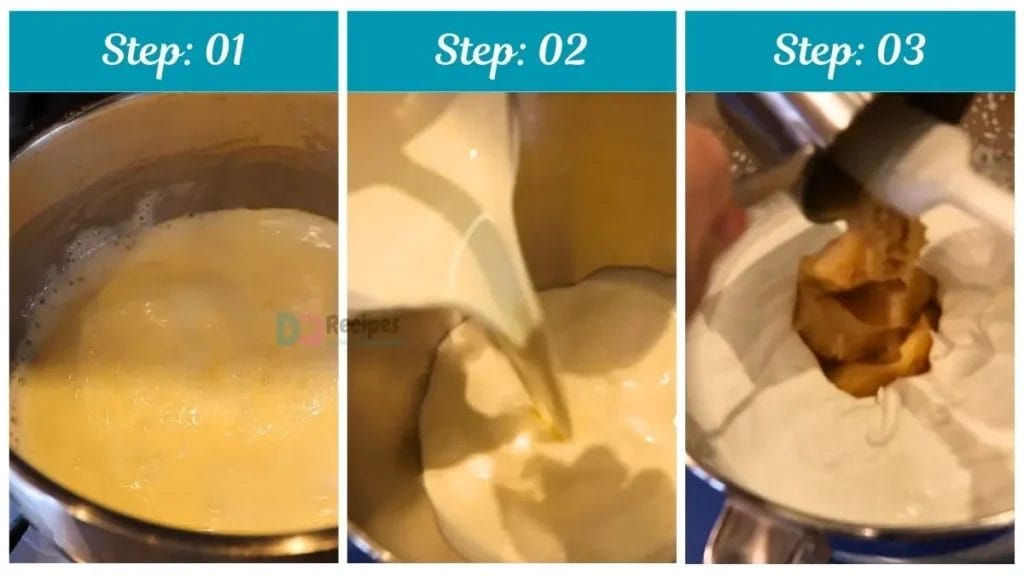
Step 2 – Add Sweetened Condensed Milk:
Once the cream is whipped, gently pour in your room-temperature sugar-free sweetened condensed milk. This ingredient gives the ice cream its rich, creamy Dairy Queen–like flavor.
Step 3 – Combine Carefully:
Whip on low speed just until the mixture comes together. If the cream starts to thicken too much, stop mixing and fold with a spatula to avoid overwhipping. The base should look smooth and airy.
Step 4 – Freeze for No-Machine Method:
Transfer the mixture into a freezer-safe container with a lid (or loaf pan wrapped tightly with cling film). Freeze for 1–2 hours for soft serve texture, or 3–4 hours if you prefer scoopable ice cream. For firmer, store-bought style ice cream, freeze overnight.
Step 5 – Ice Cream Maker Method (Optional):
If using a machine, pour the base into a properly chilled tub and churn on maximum hardness until soft serve consistency forms. Scoop directly or pipe into bowls for a classic swirl.
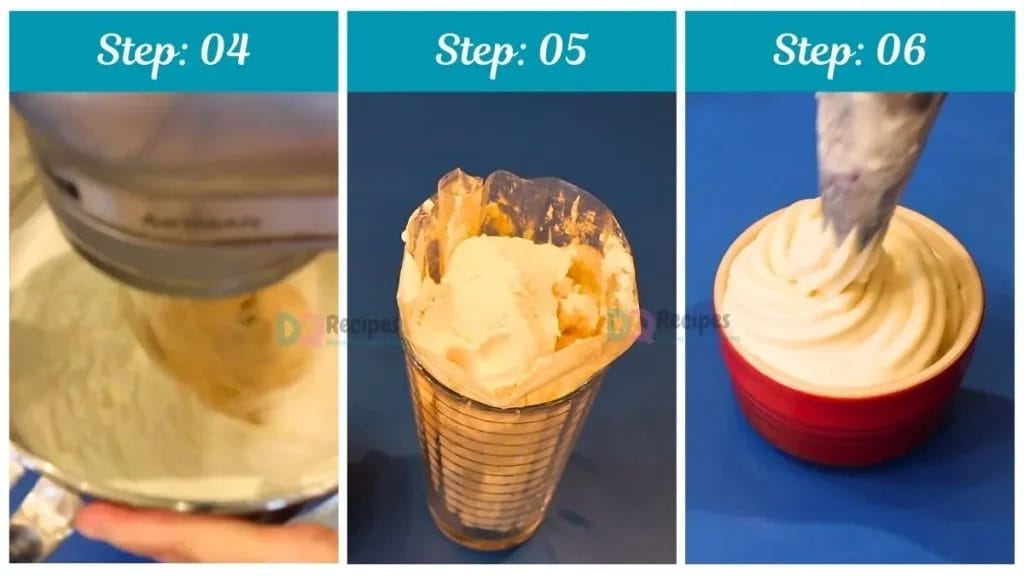
Step 6 – Serve & Enjoy:
Top with sugar-free chocolate syrup, nuts, or fresh berries. Enjoy immediately for the creamiest texture, or store leftovers in the freezer for later.
Delicious Ways to Customize and Serve This Dairy Queen Soft Serve Ice Cream
Here are some Variations and Customizations ideas you can try to enjoy this Dairy Queen Soft Serve Ice Cream deliciously
1. Classic Chocolate Drizzle – Nothing beats a soft swirl topped with a generous drizzle of sugar-free chocolate syrup. It gives that nostalgic DQ cone feel.
2. Berry Burst Bowl – I love topping mine with fresh strawberries, blueberries, or raspberries. The natural tartness pairs beautifully with the creamy sweetness.
3. Nutty Crunch – A sprinkle of chopped almonds or pecans adds the perfect crunch. Sometimes I even toast the nuts lightly for extra flavor.
4. Homemade Sundae – I layer soft serve with sugar-free caramel sauce and a few crushed nuts in a glass. It feels like a fancy sundae shop treat.
5. Ice Cream Sandwich – Once, I placed a scoop between two keto-friendly cookies-instant ice cream sandwich that was a total hit with my kids.
6. Waffle Cone Magic – Serving it in a crunchy waffle cone (store-bought or homemade) brings out that true Dairy Queen vibe.
7. Coffee Lovers’ Dream – I’ve poured a shot of hot espresso over a scoop to make an affogato. The contrast of hot and cold is just divine.
8. Tropical Escape – On a hot day, I topped mine with shredded coconut and a few chunks of pineapple. It tasted like a mini island vacation.
9. Brownie Sundae – A warm, fudgy brownie with a swirl of soft serve on top… let’s just say it disappeared in seconds.
10. Peanut Butter Swirl – Melting a spoonful of peanut butter and drizzling it over the soft serve has become one of my go-to late-night treats. The combo is simply irresistible.
Some Notable Tips and Tricks on This Dairy Queen Soft Serve Ice Cream Recipe
Here are some tips and tricks you should follow when trying this recipe.
1. Keep your cream cold – Cold cream makes the ice cream fluffy.
2. Don’t whip too much – If you whip too long, it turns into butter! Stop when it’s soft and puffy.
3. Warm milk is a no-no – Make sure your sweet milk is cool, not hot. Hot milk makes it melt.
4. Mix gently – Be kind to your ice cream mix. Stir soft, not too hard.
5. Use a freezer-safe box – A tight lid keeps it safe and tasty in the freezer.
6. Wait just right – One hour gives you soft serve. Three hours makes it scoopable. Overnight makes it hard like store ice cream.
7. Try a piping bag – Want the swirl like Dairy Queen? Use a bag with a tip.
8. Eat fast – This ice cream melts quick, so enjoy right away.
9. Add fun toppings – Try nuts, fruit, or sugar-free chocolate. It makes it extra yummy.
10. Share with friends – Ice cream is always better when you share a bowl with someone you love.
How to Store and Reheat Leftover Dairy Queen Soft Serve Ice Cream Properly?
If you have any leftover (hopefully you don’t have) you can process them properly as follows,
Store leftovers in a freezer-safe airtight container. For the best texture, consume within 3–4 days. To serve again, let the ice cream sit at room temperature for 5 minutes before scooping.
Dairy Queen Soft Serve Ice Cream Recipe
If you’ve ever craved that creamy, dreamy Dairy Queen Soft Serve Ice Cream recipe at home, you’re in for a treat. The best part? You only need two ingredients to recreate this magic-no fancy stabilizers, no long list of hard-to-find items. Just pure, rich, velvety soft serve in your own kitchen.
- 2 cups chilled heavy whipping cream
- 1 batch sugar-free sweetened condensed milk (room temperature)
- Sugar-free chocolate syrup
- Chopped nuts or berries
- Step 1 – Whip the Cream:
Pour 2 cups of chilled heavy whipping cream into a mixing bowl or stand mixer. Whip on medium speed until it reaches a soft-to-medium stiffness. Be careful not to overwhip, as this can turn the cream into butter.Step 2 – Add Sweetened Condensed Milk:
Once the cream is whipped, gently pour in your room-temperature sugar-free sweetened condensed milk. This ingredient gives the ice cream its rich, creamy Dairy Queen–like flavor.Step 3 – Combine Carefully:
Whip on low speed just until the mixture comes together. If the cream starts to thicken too much, stop mixing and fold with a spatula to avoid overwhipping. The base should look smooth and airy.Step 4 – Freeze for No-Machine Method:
Transfer the mixture into a freezer-safe container with a lid (or loaf pan wrapped tightly with cling film). Freeze for 1–2 hours for soft serve texture, or 3–4 hours if you prefer scoopable ice cream. For firmer, store-bought style ice cream, freeze overnight.Step 5 – Ice Cream Maker Method (Optional):
If using a machine, pour the base into a properly chilled tub and churn on maximum hardness until soft serve consistency forms. Scoop directly or pipe into bowls for a classic swirl.Step 6 – Serve & Enjoy:
Top with sugar-free chocolate syrup, nuts, or fresh berries. Enjoy immediately for the creamiest texture, or store leftovers in the freezer for later.
Store leftovers in a freezer-safe airtight container. For the best texture, consume within 3–4 days. To serve again, let the ice cream sit at room temperature for 5 minutes before scooping.
FAQs on this Copycat Dairy Queen Soft Serve Ice Cream Recipe
When you give this Dairy Queen Soft Serve Ice Cream Recipe a try, you might have a few questions. Don’t worry-we’ve rounded up answers to the most common ones to help you out.
1. What are the ingredients of Dairy Queen soft serve ice cream?
From my experience recreating it at home, the core ingredients are heavy whipping cream and sugar-free sweetened condensed milk. That’s really all you need to get the creamy, rich base. Of course, Dairy Queen’s commercial recipe includes stabilizers and other additives for texture and storage, but the homemade version tastes just as indulgent without all the extras.
2. What makes Dairy Queen soft serve different?
The secret lies in its light, airy texture. Dairy Queen uses a special machine that incorporates air while freezing, giving that smooth, fluffy swirl we all love. At home, I found that whipping the cream to medium stiffness before combining it with condensed milk mimics that same effect beautifully.
3. What is the main ingredient in soft serve ice cream?
The main ingredient is always cream (or milk). In my version, I rely on heavy whipping cream for richness. Pairing it with sugar-free sweetened condensed milk creates the perfect soft serve texture without needing extra thickeners.
4. How is DQ ice cream made?
In Dairy Queen stores, the ice cream base is pre-mixed and stored in special soft-serve machines that keep it at just the right temperature and consistency. At home, I achieve a similar result by whipping the cream, folding in the sweetened condensed milk, and then freezing. It’s surprisingly close to the real deal!
5. Can I make this Dairy Queen soft serve without a machine?
Yes, absolutely! I’ve made it plenty of times without a machine. After combining the two ingredients, just freeze the mixture in an airtight container for 1–2 hours for soft serve texture. It works like a charm.
6. How do I prevent my soft serve from turning into butter?
From my experience, the trick is not over-whipping the cream. Stop at medium stiffness-if you go too far, the fat separates, and you’ll end up with sweet butter instead of creamy ice cream. Folding gently at the end also helps.
7. Can I make this recipe keto-friendly?
Yes! This version is naturally keto-friendly because the sugar-free condensed milk keeps the carb count very low. I often serve it to my keto friends, and they love it.
8. How long does homemade Dairy Queen soft serve last in the freezer?
I recommend enjoying it within 3–4 days for the best texture. It’s a softer ice cream without stabilizers, so it melts faster and firms up more than store-bought. Letting it sit for a few minutes before scooping makes it creamy again.
9. Can I add flavors or mix-ins to this recipe?
Definitely! I’ve tried adding sugar-free cocoa powder for a chocolate version, and even a few drops of vanilla or almond extract. You can also fold in nuts, berries, or chocolate chips right before freezing. It’s very customizable.
10. How can I get that classic Dairy Queen swirl at home?
The fun part is using a piping bag with a star tip. Once the ice cream reaches soft-serve consistency, pipe it directly into a cone or cup. I’ve done it a few times, and it looks so much like the real Dairy Queen swirl-it always impresses my guests.
This Dairy Queen Soft Serve Ice Cream recipe is the perfect way to enjoy your favorite frozen treat at home-with fewer ingredients and more wholesome flavor. Whether you serve it straight from the machine, swirl it into a cone, or enjoy it with toppings, it’s guaranteed to satisfy your cravings.
We’d love to hear how this recipe turns out for you! Give it a try, then drop a comment below to share your thoughts and tips with us.
You can also follow us on Pinterest, and YouTube for more delicious updates and kitchen inspiration. Your feedback and support mean the world to us!
3 comments