There’s something magical about making Cuisinart Oreo Ice Cream at home-that perfect balance of velvety cream studded with crunchy chocolate cookie bits.
This no-churn recipe delivers restaurant-quality cookies and cream ice cream without any fancy ice cream maker.
Whether you’re craving a nostalgic dessert or looking to impress guests with homemade frozen treats, this Oreo Cuisinart Ice Cream combines the beloved sandwich cookie with rich, whipped cream for an indulgent result.
The best part? You only need five simple ingredients and about 15 minutes of active prep time to create this crowd-pleasing dessert that rivals any premium store-bought brand.
What Does Cuisinart Oreo Ice Cream Taste Like?
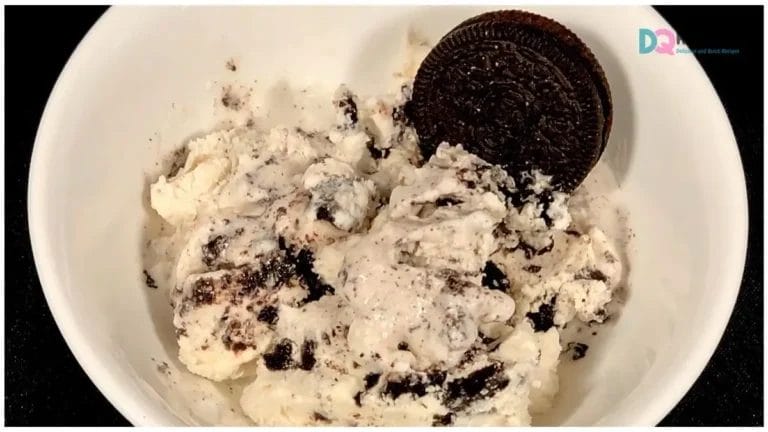
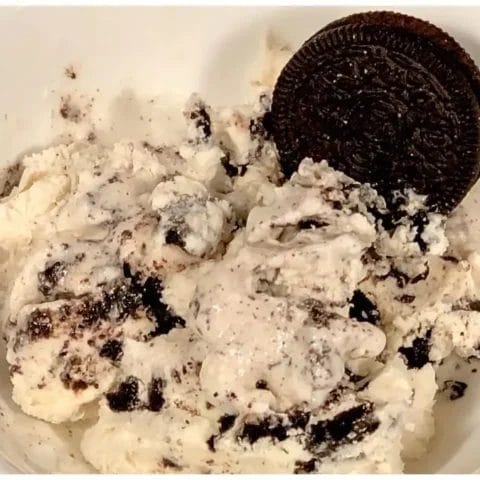
Imagine biting into clouds of sweet, creamy vanilla ice cream punctuated by bursts of chocolate cookie crunch.
This homemade Oreo ice cream offers a luxuriously smooth texture thanks to the whipped fresh cream base, while sweetened condensed milk adds that signature ice cream sweetness without any icy crystals.
Check out ice cream recipe books to learn more!
The vanilla essence enhances the cream’s natural richness, and those crushed Oreo biscuits provide the iconic cookies-and-cream flavor-slightly bitter chocolate wafers mingling with sweet vanilla cream filling.
Each spoonful delivers contrasting textures: silky smoothness against satisfying cookie crunch.
It’s less artificial-tasting than commercial versions, with a genuine dairy flavor that melts beautifully on your tongue.
Cuisinart Oreo Ice Cream Recipe Ingredients
Main Ingredients:
- 1 liter (4 cups) chilled fresh cream – Full-fat dairy cream like Amul fresh cream, well-chilled
- ½ cup sweetened condensed milk – Or substitute with ½ cup powdered sugar for less sweetness
- 1 tsp vanilla essence – Vanilla extract(Halal) or any preferred flavor essence
- 3 small packets Oreo biscuits – Approximately 39 g each (about 117 g total)
- 2 packets for mixing into the cream
- 1 packet for extra crunch and garnish
Kitchen Utensils & Equipment:
- Electric hand beater (or stand mixer)
- Large mixing bowl (chilled in refrigerator)
- Beater blades or whisk attachments (chilled in freezer)
- Larger bowl filled with ice (for temperature control)
- Rolling pin (for crushing cookies)
- Rubber spatula or silicone spoon
- Airtight freezer-safe container with lid
- Measuring cups and spoons
Preparation and Cooking Time
| Time Component | Duration |
|---|---|
| Prep Time | 15 minutes |
| Chilling Time | 2 hours (cream & equipment) |
| Freezing Time | 6-8 hours or overnight |
| Total Time | ~8-10 hours |
| Servings | 8-10 servings |
| Difficulty Level | Easy |
Step-by-Step Cuisinart Oreo Ice Cream Recipe Instructions
Step 1: Chill Everything (2 Hours Ahead)
Place the unopened 1-liter pack of fresh cream in the refrigerator for at least 2 hours-not in the freezer, as we need it cold but still liquid.
Simultaneously, put your large mixing bowl in the fridge and the beater blades in the freezer. This pre-chilling is crucial for achieving proper whipped cream consistency and preventing the mixture from becoming too warm during beating.
Step 2: Separate and Whip the Cream
Remove your chilled cream from the refrigerator and pour it into a bowl. You’ll notice thick cream at the top and thinner liquid below-scoop only the thick portion into your chilled mixing bowl, reserving the thin liquid for other culinary uses like curries or tea. Position this mixing bowl over a larger bowl filled with ice to maintain cold temperature throughout whipping.
Attach your chilled beater blades and start on low speed, gradually increasing to high. Beat for approximately 3-4 minutes until the cream doubles in volume, becoming light, fluffy, and holding soft peaks.
Important: Stop immediately when it reaches smooth, airy consistency-over-beating will cause the fat to separate and turn into butter.
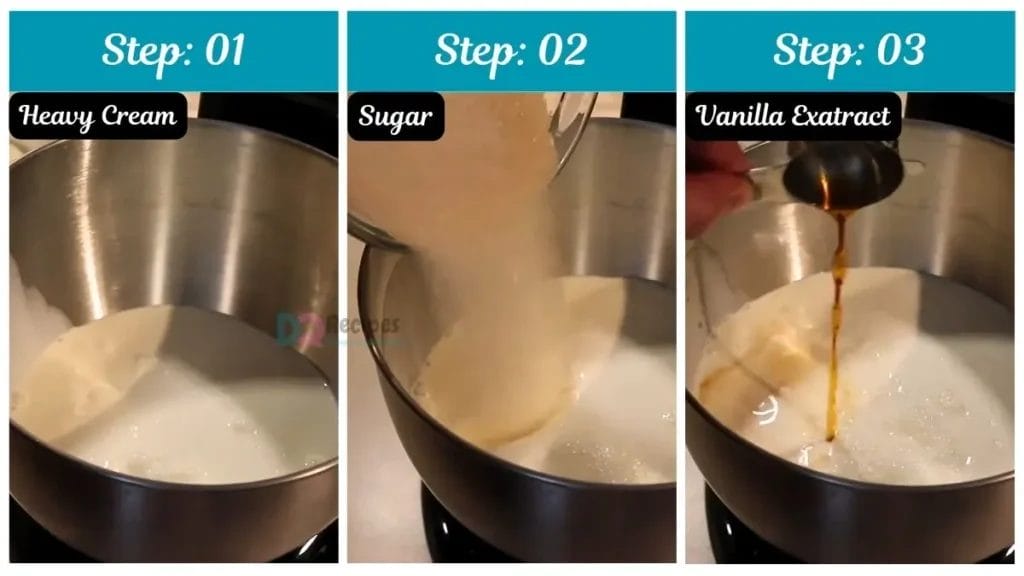
Step 3: Sweeten and Flavor
Once your cream has reached perfect whipped consistency, add ½ cup of sweetened condensed milk and 1 teaspoon of vanilla essence directly into the bowl.
Beat on medium speed for just 30 seconds until the sweetener and flavoring are fully incorporated throughout the cream.
The condensed milk not only sweetens but also prevents ice crystals from forming during freezing, ensuring that signature creamy texture in your Cuisinart Oreo ice cream.
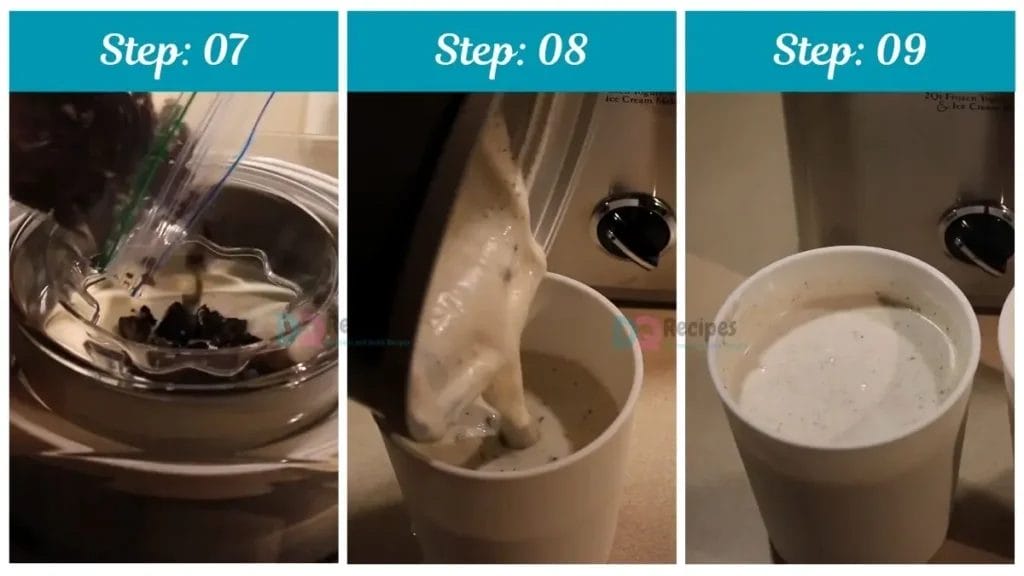
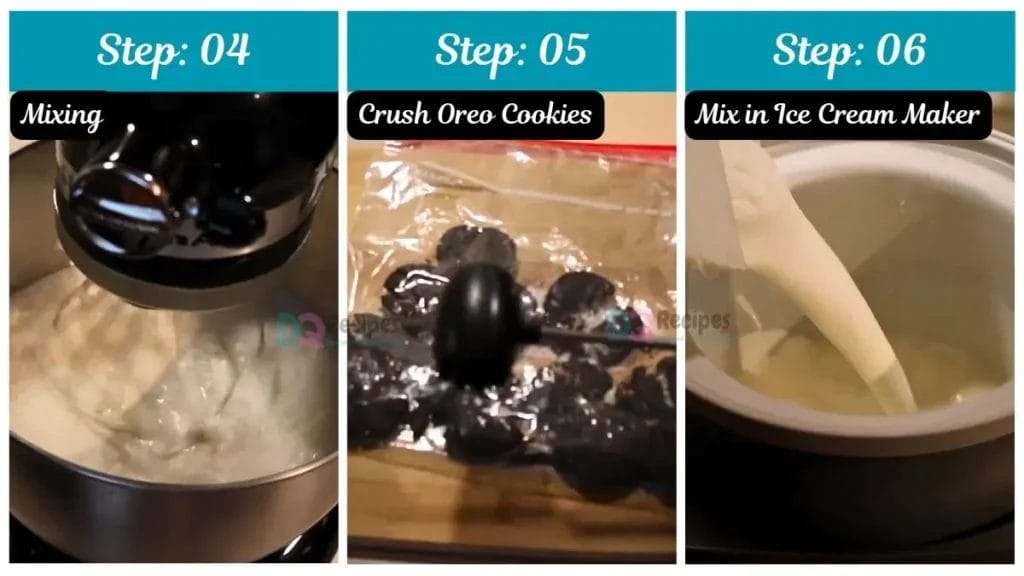
Step 4: Crush and Fold Oreos
Take 2 of your 3 small Oreo packets (still sealed) and place them on a flat surface. Using a rolling pin, firmly crush the biscuits inside the packet until you have a mix of fine-to-medium crumbs-you want variety in texture, not complete powder.
Open the packets and pour all the cookie crumbs into your sweetened whipped cream. Switch from electric beater to a rubber spatula and gently fold the Oreo pieces throughout the mixture using broad, sweeping motions from the bottom up.
This manual folding preserves the airy texture you worked hard to create.
Step 5: Add Optional Extra Crunch
For those who love maximum cookie texture in their Oreo Cuisinart ice cream, break 4-5 whole biscuits from your third packet into small, irregular chunks (about quarter-sized pieces).
Fold these larger pieces gently into the mixture-they’ll provide surprise bursts of substantial crunch that contrast beautifully with the finer cookie crumbs.
Step 6: Pack and Garnish
Transfer your homemade Oreo ice cream mixture into an airtight, freezer-safe container using your spatula, scraping every bit of that precious cream from the bowl. Level the top surface with the back of a spoon for even freezing.
Take the remaining Oreos from your third packet and break them into large, visually appealing pieces. Press these cookie chunks lightly onto the surface as garnish-they’ll create an attractive, Instagram-worthy presentation and give the first scoop extra cookie goodness.
Step 7: Freeze Until Firm
Seal your container tightly with its lid to prevent freezer burn and ice crystal formation. For organization, you can label it with the preparation date.
Place in the coldest part of your freezer and let it set for 6-8 hours minimum, though overnight freezing (12 hours) yields the best texture. Resist the temptation to check it frequently-opening and closing disrupts the freezing process.
7 Customization and Pairing Ideas for Serving
1. Double Chocolate Oreo Delight: Transform your Cuisinart Oreo ice cream into an ultra-decadent treat by drizzling warm chocolate fudge sauce over scoops and topping with chocolate shavings.
For even more chocolate intensity, substitute half the vanilla essence with chocolate extract in the base mixture, or use chocolate cream sandwich cookies alongside regular Oreos.
2. Cookies and Cream Brownie Sundae: Create an irresistible dessert bar experience by serving generous scoops over warm, freshly baked brownies.
Add a dollop of whipped cream, a drizzle of caramel sauce, and crushed Oreo pieces on top. This pairing combines temperatures and textures-warm fudgy brownie against cold creamy ice cream-for an unforgettable contrast.
3. Birthday Cake Remix: Mix in colorful rainbow sprinkles and chunks of vanilla cake into your Oreo Cuisinart ice cream base before freezing.
When serving, top with buttercream frosting rosettes and additional sprinkles for a birthday cake-inspired frozen dessert that’s perfect for celebrations without the traditional cake.
4. Peanut Butter Cup Variation: Swirl in ⅓ cup of creamy peanut butter along with the condensed milk for a peanut butter cookies and cream hybrid. You can also fold in chopped peanut butter cups or Reese’s pieces for added texture.
The salty-sweet combination of peanut butter with Oreos creates an addictive flavor profile.
5. Coffee Shop-Style Affogato: Elevate your homemade Oreo ice cream to café-quality by serving it affogato-style-place one or two scoops in a small bowl or glass, then pour a shot of hot espresso over the top just before serving.
The warm coffee melts the ice cream slightly, creating a cookies-and-cream cappuccino experience that coffee lovers will adore.
6. Ice Cream Sandwich Creation: Use your frozen Cuisinart Oreo ice cream as filling between two large cookies-chocolate chip, sugar cookies, or even additional Oreos work wonderfully.
Gently press together, roll the edges in mini chocolate chips or sprinkles, then wrap individually in parchment paper and refreeze for portable treats.
7. Tropical Twist with Fresh Fruit: Balance the richness of Oreo ice cream by serving alongside fresh fruit like strawberry slices, banana chunks, or mango pieces.
The fruit’s natural acidity and freshness cut through the cream’s heaviness, making it suitable as a lighter summer dessert option. A drizzle of berry coulis adds restaurant-quality presentation.
7 Essential Tips for Perfect Cuisinart Oreo Ice Cream
Tip 1: Temperature Control Is Everything – The success of no-churn Oreo ice cream hinges entirely on maintaining cold temperatures throughout the process.
If your kitchen is warm, work quickly and consider chilling your ingredients even longer than recommended. Some ice cream enthusiasts even chill their final container before filling it.
The bowl-over-ice technique isn’t optional-it prevents the cream from warming up during beating, which would result in a grainy, separated texture rather than smooth, scoopable ice cream.
Tip 2: Fresh Cream Quality Matters – Not all cream is created equal for making Cuisinart Oreo ice cream. Look for full-fat dairy cream (minimum 35% fat content) like Amul fresh cream or heavy whipping cream. Low-fat or light cream won’t whip properly or maintain structure during freezing.
Check the expiration date and ensure the cream smells fresh-any hint of sourness will ruin your entire batch. The cream should be ultra-fresh for the best flavor and whipping performance.
Tip 3: Don’t Skip the Cream Separation Step – When you open chilled cream, you’ll notice the thick portion naturally separates from thinner liquid. Many beginners skip this step and use everything, resulting in runny ice cream that never properly sets.
Scooping out only the thick cream is essential-it contains the fat necessary for that luxurious, scoopable texture. Save that thin liquid for coffee, tea, or cooking; it’s too watery for ice cream but perfectly useful elsewhere.
Tip 4: Master the Whipping Timing – The window between perfectly whipped cream and over-beaten butter is surprisingly narrow-sometimes just 30-60 seconds. Watch your mixture carefully: you want soft-to-medium peaks that hold their shape but still look glossy and smooth.
If you see the cream starting to look grainy, clumpy, or yellowish, stop immediately-you’ve gone too far. Under-whipped cream won’t create the right texture, but over-whipped cream cannot be salvaged.
Set a timer and check frequently during the final minute of beating.
Tip 5: Customize Your Cookie Texture – The beauty of homemade Oreo ice cream is controlling your cookie-to-cream ratio.
Some prefer fine crumbs that distribute evenly (achieved by crushing thoroughly), while others love big chunks that provide dramatic texture contrast. For the finest texture, pulse Oreos in a food processor.
For maximum variety, use three different sizes: powder-fine crumbs, medium pieces, and large chunks.
You can even separate the cookie wafers from the cream filling-some people love folding in just the chocolate cookies for a less sweet version.
Tip 6: Prevent Ice Crystals and Freezer Burn – Nothing ruins Cuisinart Oreo ice cream faster than ice crystals creating a grainy, icy texture. The sweetened condensed milk helps prevent this, but proper storage is equally important.
Always use an airtight container and press plastic wrap directly onto the ice cream surface before sealing with the lid-this eliminates air exposure.
Don’t store your ice cream in the freezer door where temperature fluctuates; keep it in the back where it’s coldest and most stable. Consume within 2-3 weeks for optimal texture and flavor.
Tip 7: Soften Before Scooping – Homemade ice cream freezes harder than commercial varieties because it lacks commercial stabilizers and air incorporation machinery. Remove your Oreo Cuisinart ice cream from the freezer and let it sit at room temperature for 5-10 minutes before attempting to scoop.
This brief softening period makes serving infinitely easier and improves the eating experience-the ice cream will be creamy rather than rock-hard.
Alternatively, run your ice cream scoop under hot water between scoops for clean, professional-looking portions. Never microwave ice cream to soften it, as this creates uneven melting and ruins the texture.
Storage and Reheating Guidance
Store your Cuisinart Oreo ice cream in an airtight, freezer-safe container in the coldest part of your freezer (not the door). It keeps well for 2-3 weeks, though it’s best consumed within the first week for optimal texture and flavor. No reheating needed-simply let it soften at room temperature for 5-10 minutes before scooping for easiest serving.
Cuisinart Oreo Ice Cream Recipe
There’s something magical about making Cuisinart Oreo Ice Cream at home-that perfect balance of velvety cream studded with crunchy chocolate cookie bits. This no-churn recipe delivers restaurant-quality cookies and cream ice cream without any fancy ice cream maker.
Ingredients
- 1 liter (4 cups) chilled fresh cream
- ½ cup sweetened condensed milk
- 1 tsp vanilla essence
- 3 small packets Oreo biscuits
Instructions
Step 1: Chill Everything (2 Hours Ahead)
Place the unopened 1-liter pack of fresh cream in the refrigerator for at least 2 hours-not in the freezer, as we need it cold but still liquid. Simultaneously, put your large mixing bowl in the fridge and the beater blades in the freezer. This pre-chilling is crucial for achieving proper whipped cream consistency and preventing the mixture from becoming too warm during beating.
Step 2: Separate and Whip the Cream
Remove your chilled cream from the refrigerator and pour it into a bowl. You’ll notice thick cream at the top and thinner liquid below-scoop only the thick portion into your chilled mixing bowl, reserving the thin liquid for other culinary uses like curries or tea. Position this mixing bowl over a larger bowl filled with ice to maintain cold temperature throughout whipping. Attach your chilled beater blades and start on low speed, gradually increasing to high. Beat for approximately 3-4 minutes until the cream doubles in volume, becoming light, fluffy, and holding soft peaks. Important: Stop immediately when it reaches smooth, airy consistency-over-beating will cause the fat to separate and turn into butter.
Step 3: Sweeten and Flavor
Once your cream has reached perfect whipped consistency, add ½ cup of sweetened condensed milk and 1 teaspoon of vanilla essence directly into the bowl. Beat on medium speed for just 30 seconds until the sweetener and flavoring are fully incorporated throughout the cream. The condensed milk not only sweetens but also prevents ice crystals from forming during freezing, ensuring that signature creamy texture in your Cuisinart Oreo ice cream.
Step 4: Crush and Fold Oreos
Take 2 of your 3 small Oreo packets (still sealed) and place them on a flat surface. Using a rolling pin, firmly crush the biscuits inside the packet until you have a mix of fine-to-medium crumbs-you want variety in texture, not complete powder. Open the packets and pour all the cookie crumbs into your sweetened whipped cream. Switch from electric beater to a rubber spatula and gently fold the Oreo pieces throughout the mixture using broad, sweeping motions from the bottom up. This manual folding preserves the airy texture you worked hard to create.
Step 5: Add Optional Extra Crunch
For those who love maximum cookie texture in their Oreo Cuisinart ice cream, break 4-5 whole biscuits from your third packet into small, irregular chunks (about quarter-sized pieces). Fold these larger pieces gently into the mixture-they’ll provide surprise bursts of substantial crunch that contrast beautifully with the finer cookie crumbs.
Step 6: Pack and Garnish
Transfer your homemade Oreo ice cream mixture into an airtight, freezer-safe container using your spatula, scraping every bit of that precious cream from the bowl. Level the top surface with the back of a spoon for even freezing. Take the remaining Oreos from your third packet and break them into large, visually appealing pieces. Press these cookie chunks lightly onto the surface as garnish-they’ll create an attractive, Instagram-worthy presentation and give the first scoop extra cookie goodness.
Step 7: Freeze Until Firm
Seal your container tightly with its lid to prevent freezer burn and ice crystal formation. For organization, you can label it with the preparation date. Place in the coldest part of your freezer and let it set for 6-8 hours minimum, though overnight freezing (12 hours) yields the best texture. Resist the temptation to check it frequently-opening and closing disrupts the freezing process.
Notes
Store your Cuisinart Oreo ice cream in an airtight, freezer-safe container in the coldest part of your freezer (not the door). It keeps well for 2-3 weeks, though it’s best consumed within the first week for optimal texture and flavor. No reheating needed-simply let it soften at room temperature for 5-10 minutes before scooping for easiest serving.
Nutrition Information:
Yield: 8 Serving Size: 1Amount Per Serving: Calories: 250
Common Queries and FAQs
Q: Can I make Cuisinart Oreo ice cream without an ice cream maker?
A: Absolutely! This recipe is specifically designed as a no-churn method that doesn’t require any ice cream machine. The whipped cream technique creates enough air incorporation and the condensed milk prevents ice crystals, delivering creamy results with just an electric hand beater. This makes homemade Oreo ice cream accessible to anyone without expensive equipment.
Q: Why isn’t my Oreo ice cream setting properly in the freezer?
A: This usually happens for three reasons: the cream wasn’t whipped enough (it should double in volume and hold soft peaks), the cream wasn’t cold enough when you started beating, or you used low-fat cream instead of full-fat. Ensure your cream has at least 35% fat content and is properly chilled. Over-beating can also cause issues if the cream separates into butter.
Q: Can I substitute ingredients in this Cuisinart Oreo ice cream recipe?
A: You have some flexibility! Replace sweetened condensed milk with ½ cup powdered sugar for less sweetness (add it gradually while beating). Vanilla essence can be swapped for almond, chocolate, or coffee extract.
Any chocolate sandwich cookie works instead of Oreos-try Hydrox, Bourbon biscuits, or even chocolate chip cookies. However, don’t substitute the heavy cream with milk, half-and-half, or low-fat alternatives, as these won’t create the proper texture.
Q: How do I prevent my homemade ice cream from becoming icy?
A: Ice crystals form when water molecules in the cream freeze individually. The sweetened condensed milk acts as an anti-freeze agent by lowering the freezing point. Additional tips: ensure your mixture is completely smooth before freezing, minimize air exposure by using an airtight container with plastic wrap pressed directly on the surface, avoid repeated freeze-thaw cycles by portioning if needed, and maintain consistent freezer temperature (don’t store in the door where temperature fluctuates).
Q: Can I make this Oreo Cuisinart ice cream dairy-free or vegan?
A: While this specific recipe relies on dairy cream’s fat content and whipping properties, you can experiment with alternatives. Use full-fat coconut cream (refrigerate a can overnight and scoop only the solid white cream), and replace condensed milk with coconut condensed milk or cashew cream. Vegan Oreos or similar cookies work perfectly. Note that coconut cream has a distinct flavor and slightly different texture, but many find it delicious in its own right.
Q: How long does homemade Oreo ice cream last in the freezer?
A: Your Cuisinart Oreo ice cream maintains best quality for 1-2 weeks and remains safe to eat for up to 3 weeks when stored properly in an airtight container. Unlike commercial ice cream with stabilizers, homemade versions gradually develop ice crystals over time. Label your container with the preparation date and always check for signs of freezer burn before serving. The cookies may soften slightly over time as they absorb moisture from the cream.
Q: Why did my whipped cream turn into butter?
A: You over-beat the cream past the whipped stage. Heavy cream contains fat globules suspended in liquid; excessive beating causes these globules to clump together, separating into solid butter and liquid buttermilk. This happens quickly-sometimes within 30 seconds after reaching perfect peaks. The solution is vigilant monitoring: stop beating as soon as the cream holds soft peaks and looks smooth. Unfortunately, over-beaten cream cannot be reversed, so you’ll need to start fresh with new cream.
Q: Can I add other mix-ins besides Oreos to this ice cream base?
A: Absolutely! This versatile no-churn ice cream base accepts numerous mix-ins. Try chocolate chips, brownie chunks, crushed candy bars, chopped nuts, cookie dough pieces, or fruit preserves. Add mix-ins during the folding stage after sweetening. Avoid fresh fruit with high water content (like watermelon) as it creates ice crystals; use freeze-dried fruit instead. Limit mix-ins to about 1-1.5 cups total so you don’t overwhelm the cream base.
Creating Cuisinart Oreo ice cream at home transforms a simple dessert into an achievement you’ll be proud to serve. This no-churn recipe proves that restaurant-quality frozen treats don’t require expensive equipment-just quality ingredients, proper technique, and a little patience.
The combination of whipped cream’s velvety texture with Oreo’s iconic chocolate-vanilla crunch delivers satisfaction in every spoonful. Whether you’re making it for a summer gathering, birthday celebration, or simply treating yourself, this homemade Oreo ice cream beats store-bought versions every time.
So grab those ingredients, chill your equipment, and get ready to impress everyone with your homemade frozen masterpiece! We’d love to hear how this recipe turns out for you! Give it a try, then drop a comment below to share your thoughts and tips with us.
You can also follow us on Pinterest, and YouTube for more delicious updates and kitchen inspiration. Your feedback and support mean the world to us!