
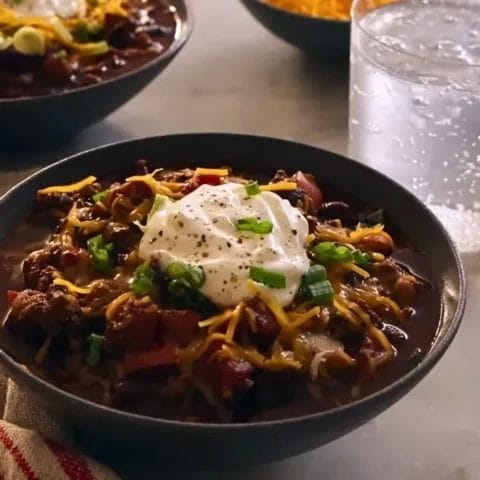
If you’re craving a bowl of warm, hearty goodness, this Dairy Queen Chili Recipe will be your new go-to comfort dish. Packed with tender ground beef, beans, peppers, onions, and a rich blend of spices, it’s the perfect recipe for cozy dinners, game nights, or even meal prep.
What makes this chili special is its balance of flavors. A touch of tomato paste and cocoa powder adds depth, while chili powder, cumin, and cayenne bring the right amount of heat. It’s a dish that’s versatile enough to be served with rice, pasta, coleslaw, or just topped with cheese and Dairy Queen Gravy.
Whether you’re feeding a hungry family or preparing make-ahead meals for the week, this Dairy Queen Chili Recipe is a hearty and delicious option that never disappoints.
My Personal Experience With This Dairy Queen Chili Recipe
The first time I made this Dairy Queen Chili Recipe, I was instantly hooked by how simple yet flavorful it was. It reminded me of the kind of comfort food that brings everyone to the table without needing much fuss.

I often prepare this chili on busy weeknights, and it has become a family favorite. My kids love customizing their bowls with shredded cheese, green onions, and sour cream, while I sometimes serve mine over rice for a fuller meal.
What I enjoy most is how versatile the recipe is-you can adjust the spice level, swap the protein, or experiment with different beans. It’s a recipe that feels both reliable and endlessly adaptable, which is why it’s always in rotation at my home.
Ingredients Required for Dairy Queen Chili Recipe
Gather all the following ingredients, before you start making this Dairy Queen Chili
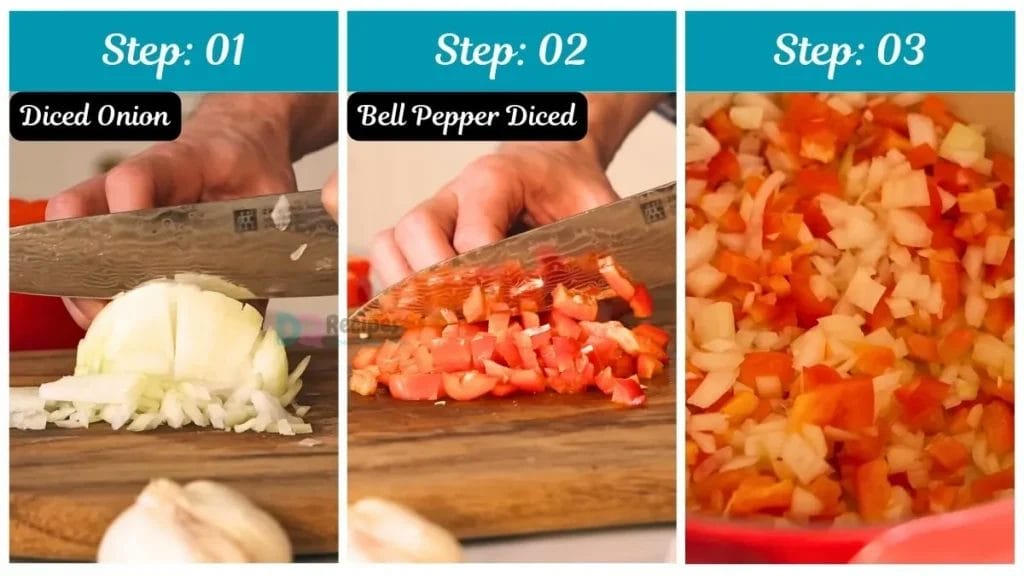
- 1 large onion, diced
- 1 bell pepper, diced
- 4–5 garlic cloves, minced or pressed
- 2 tbsp olive oil
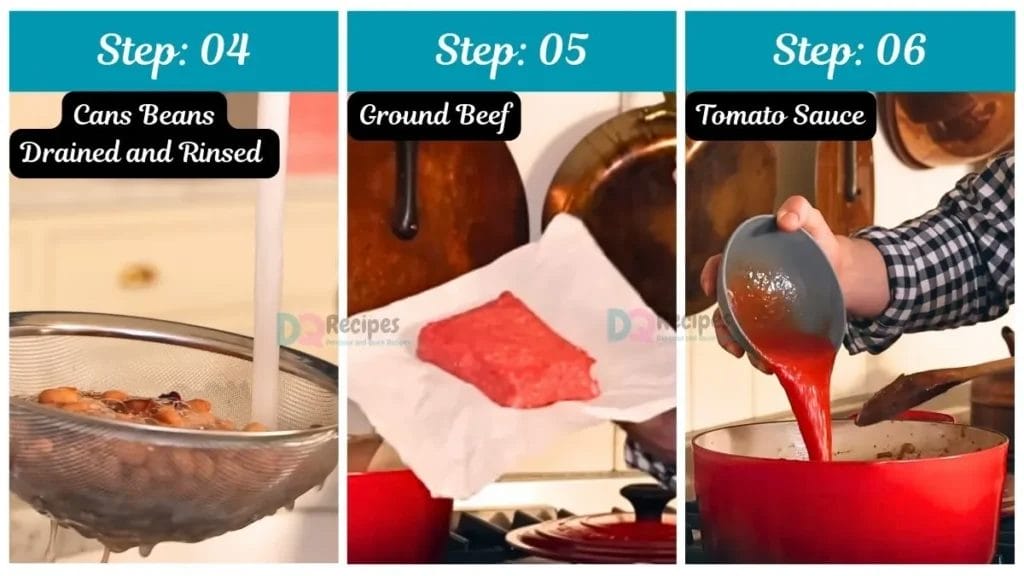
- 1 lb ground beef (90/10 lean recommended)
- 1 tbsp tomato paste
- 3 tbsp chili powder
- 1 tbsp cumin
- ¼ tsp cayenne pepper (optional, for heat)
- 1 ½ tsp oregano
- 1 tsp salt (plus more to taste)
- ¼ tsp black pepper
- 1 tbsp cocoa powder (optional, for depth)
- 1 tbsp brown sugar
- 1 (15 oz) can diced tomatoes
- 1 (8 oz) can tomato sauce
- 2 (15.5 oz) cans beans (pinto, kidney, or black), drained and rinsed
- 2 cups beef broth
- Shredded cheddar cheese
- Chopped green onions
- Sour cream
Kitchen Utensils Required
- Cutting board & sharp knife
- Garlic press (optional)
- Large Dutch oven or heavy-bottomed pot
- Wooden spoon
Preparation & Cooking Time
Prep Time: 15 minutes
Cook Time: 40 minutes
Total Time: 55 minutes
Servings: 6–8
Copycat Dairy Queen Chili Recipe
Just follow this simple step by step guideline to make your homemade version of Dairy Queen Chili in a delicious way.
1. Sauté the Vegetables
Heat 2 tablespoons of olive oil in a Dutch oven over medium-high heat. Add diced onion and bell pepper, cooking for about 5 minutes until softened. Stir in the minced garlic and cook for another minute until fragrant.
2. Brown the Meat
Add the ground beef to the pot, breaking it into small crumbles with a wooden spoon. Cook until the beef is browned and no longer pink, about 6–7 minutes. Drain excess fat if needed.
3. Build the Flavor Base
Stir in 1 tablespoon of tomato paste and cook briefly. Add chili powder, cumin, cayenne pepper, oregano, salt, and black pepper. Mix thoroughly so the spices coat the meat and vegetables.
4. Add Depth with Special Ingredients
Sprinkle in cocoa powder and brown sugar to balance acidity and enhance flavor. Stir well to combine with the beef mixture.
5. Incorporate Liquids & Beans
Pour in the diced tomatoes, tomato sauce, drained beans, and beef broth. Use a spoon to scrape up any browned bits from the bottom of the pot. These add rich, savory flavor.
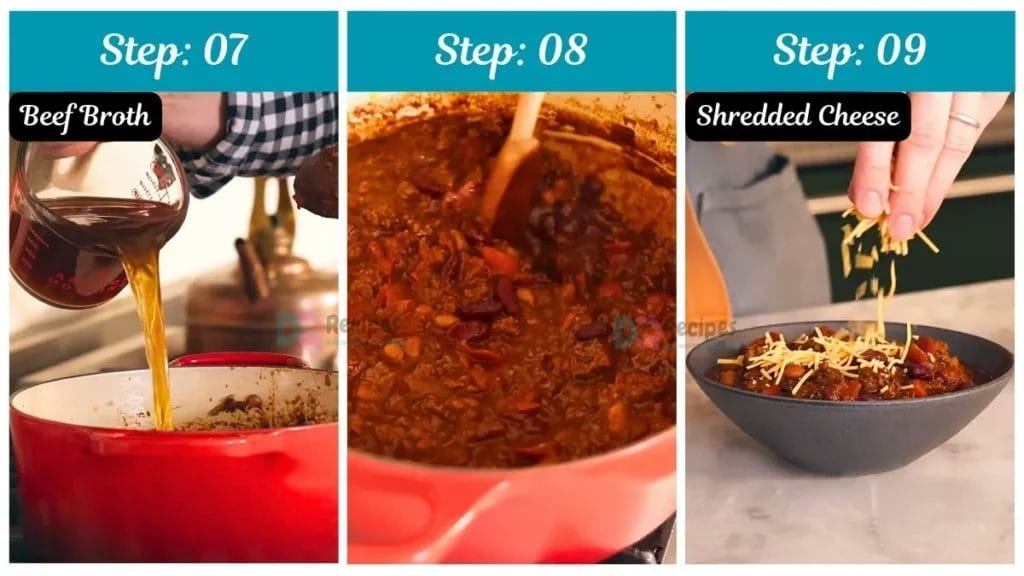
6. Simmer to Perfection
Bring the chili to a gentle boil, then reduce heat to low. Simmer uncovered for 25–30 minutes, stirring occasionally, until thickened. Taste and adjust seasonings as needed. Serve hot with shredded cheese, green onions, and sour cream.
Delicious Ways to Customize and Serve This Dairy Queen Chili
Here are some Variations and Customizations ideas you can try to enjoy this Dairy Queen Chili deliciously
1. With Buttery Cornbread
There’s something magical about a warm slice of cornbread with chili. I usually bake mine with a drizzle of honey, and the sweet bite balances the smoky spice of the chili beautifully.
2. Over Steamed White Rice
On nights when I want a heartier meal, I spoon this chili over fluffy rice. It soaks up all the flavors and turns one bowl into pure comfort food.
3. Topped with Crunchy Tortilla Chips
A handful of tortilla chips on top adds a perfect crunch. Sometimes we even use the chips as little scoops-fun for kids and adults alike.
4. As a Chili Dog Topping
One of my family’s favorite game-night treats is chili dogs. A generous ladle of this chili over grilled hot dogs and buns instantly transforms them into a feast.
5. With a Baked Potato
We often serve leftover chili over baked potatoes. The creamy inside of the potato pairs so well with the rich, hearty chili. Add cheese and sour cream, and it’s a meal on its own.
6. Paired with Pasta
Think of it as a Tex-Mex spin on spaghetti night. Chili over pasta is surprisingly good-it’s like a cross between Bolognese and comfort chili.
7. With a Side Salad
For a lighter pairing, I love serving chili alongside a crisp green salad with a tangy vinaigrette. The freshness cuts through the richness of the dish.
8. As a Nacho Topping
We sometimes spread tortilla chips on a tray, spoon chili over them, sprinkle with cheese, and pop it under the broiler. Loaded nachos with chili are always a crowd-pleaser.
9. With Garlic Bread
This might sound unusual, but trust me-it works. Garlic bread soaks up the chili just like cornbread does, and the buttery, garlicky flavors are incredible with each bite.
10. In a Bread Bowl
When we want to get fancy, we hollow out round loaves of bread and ladle the chili inside. The bread absorbs the chili, and tearing off chunks to eat with the stew is irresistible.
Some Notable Tips and Tricks on This Dairy Queen Chili Recipe
Here are some tips and tricks you should follow when trying this recipe.
1. Use a sharp knife. A sharp knife makes cutting onions and peppers much easier and safer.
2. Wash your beans. If you use canned beans, give them a rinse. This makes the chili taste better.
3. Don’t burn the garlic. Garlic cooks fast! Stir it for only a minute so it smells yummy, not bitter.
4. Break up the meat. Use your spoon to make the beef small and crumbly. That way, it mixes better.
5. Taste your chili. Before serving, try a little. You can always add more salt or spice.
6. Make it your own. Want it hotter? Add more chili powder. Want it mild? Use less.
7. Add toppings. Cheese, sour cream, or green onions make it extra tasty.
8. Let it simmer. The longer it cooks, the better the flavors come together.
9. Store it right. Keep leftovers in a tight container in the fridge. It lasts for days!
10. Freeze some. Put extra chili in the freezer. On a busy night, just heat and eat.
How to Store and Reheat Leftover Dairy Queen Chili Properly?
If you have any leftover (hopefully you don’t have) you can process them properly as follows,
This Dairy Queen Chili Recipe keeps well in the fridge for up to 4 days in an airtight container. For longer storage, freeze in individual portions for up to 3 months. Reheat gently on the stovetop or in the microwave until warmed through.
Dairy Queen Chili Recipe
If you’re craving a bowl of warm, hearty goodness, this Dairy Queen Chili Recipe will be your new go-to comfort dish. Packed with tender ground beef, beans, peppers, onions, and a rich blend of spices, it’s the perfect recipe for cozy dinners, game nights, or even meal prep.
Ingredients
- 1 large onion, diced
- 1 bell pepper, diced
- 4–5 garlic cloves, minced or pressed
- 2 tbsp olive oil
- 1 lb ground beef (90/10 lean recommended)
- 1 tbsp tomato paste
- 3 tbsp chili powder
- 1 tbsp cumin
- ¼ tsp cayenne pepper (optional, for heat)
- 1 ½ tsp oregano
- 1 tsp salt (plus more to taste)
- ¼ tsp black pepper
- 1 tbsp cocoa powder (optional, for depth)
- 1 tbsp brown sugar
- 1 (15 oz) can diced tomatoes
- 1 (8 oz) can tomato sauce
- 2 (15.5 oz) cans beans (pinto, kidney, or black), drained and rinsed
- 2 cups beef broth
- Shredded cheddar cheese
- Chopped green onions
- Sour cream
Instructions
1. Sauté the Vegetables
Heat 2 tablespoons of olive oil in a Dutch oven over medium-high heat. Add diced onion and bell pepper, cooking for about 5 minutes until softened. Stir in the minced garlic and cook for another minute until fragrant.
2. Brown the Meat
Add the ground beef to the pot, breaking it into small crumbles with a wooden spoon. Cook until the beef is browned and no longer pink, about 6–7 minutes. Drain excess fat if needed.
3. Build the Flavor Base
Stir in 1 tablespoon of tomato paste and cook briefly. Add chili powder, cumin, cayenne pepper, oregano, salt, and black pepper. Mix thoroughly so the spices coat the meat and vegetables.
4. Add Depth with Special Ingredients
Sprinkle in cocoa powder and brown sugar to balance acidity and enhance flavor. Stir well to combine with the beef mixture.
5. Incorporate Liquids & Beans
Pour in the diced tomatoes, tomato sauce, drained beans, and beef broth. Use a spoon to scrape up any browned bits from the bottom of the pot. These add rich, savory flavor.
6. Simmer to Perfection
Bring the chili to a gentle boil, then reduce heat to low. Simmer uncovered for 25–30 minutes, stirring occasionally, until thickened. Taste and adjust seasonings as needed. Serve hot with shredded cheese, green onions, and sour cream.
Notes
This Dairy Queen Chili Recipe keeps well in the fridge for up to 4 days in an airtight container. For longer storage, freeze in individual portions for up to 3 months. Reheat gently on the stovetop or in the microwave until warmed through.
Nutrition Information:
Yield: 6 Serving Size: 1Amount Per Serving: Calories: 420
- Dairy Queen Ranch Dressing Recipe
- Dairy Queen Hot Fudge Recipe
- Dairy Queen Buffalo Sauce Recipe
- Dairy Queen Soft Serve Ice Cream Recipe
- Dairy Queen Peanut Buster Parfait Recipe
- Dairy Queen Frozen Hot Chocolate Recipe
FAQs on this Copycat Dairy Queen Chili Recipe
When you give this Dairy Queen Chili Recipe a try, you might have a few questions. Don’t worry-we’ve rounded up answers to the most common ones to help you out.
1. What type of chili is used on hot dogs?
From my experience, hot dog chili is usually a simpler, smoother chili compared to a chunky bowl of chili. It’s often made with ground beef, tomato sauce, and spices but kept on the thinner side so it can coat the hot dog without overwhelming it. This Dairy Queen Chili Recipe can easily be adapted by simmering it a little longer and chopping the meat finer for the perfect chili dog topping.
2. How to make a chili hot dog?
To make a chili hot dog, I start by grilling or boiling the hot dogs, then placing them in warm buns. I spoon a generous amount of chili on top, sprinkle some shredded cheddar cheese, add diced onions, and finish with a dollop of sour cream or mustard depending on the mood. It’s messy, but that’s part of the fun!
3. What is usually on a chili dog?
A classic chili dog usually comes topped with beef chili, shredded cheese, chopped onions, and sometimes mustard. Personally, I love adding a little sour cream or jalapeños when I want extra heat. The Dairy Queen Chili Recipe works perfectly as the chili base because it’s hearty yet smooth enough to top a hot dog.
4. Does Dairy Queen still serve chili dogs?
Yes, some Dairy Queen locations still serve chili dogs, though it depends on the franchise and regional menu. From my experience, it’s always best to check with your local DQ since not all stores carry the same food items. Making this Dairy Queen Chili Recipe at home is the best way to enjoy that classic chili dog flavor anytime you want.
5. Can I make this Dairy Queen Chili Recipe vegetarian?
Absolutely! I’ve swapped the beef for lentils or plant-based ground meat, and it turns out delicious. Just increase the beans slightly and adjust the seasoning to keep it hearty.
6. How spicy is this chili?
This chili has a medium spice level when made as written. I’ve found that if you’re cooking for kids, you can cut back on the chili powder or cayenne. If you like more heat, just toss in jalapeños, extra cayenne, or a splash of hot sauce.
7. Can I use this chili as a topping for other dishes?
Definitely! I’ve used it over baked potatoes, nachos, pasta, and of course, hot dogs. It’s versatile and works great as a meal or as a topping.
8. How long does homemade chili last in the fridge?
From my experience, this Dairy Queen Chili Recipe lasts up to 4 days in the fridge when stored properly in an airtight container. It also freezes beautifully for up to 3 months, so I often make extra for busy nights.
9. What beans are best for this recipe?
I personally love using pinto and kidney beans because they hold their shape well and add texture. Black beans work too, so it really depends on what you have on hand.
10. How do I thicken chili if it’s too watery?
If my chili turns out a bit thin, I just let it simmer uncovered for longer to reduce the liquid. Sometimes, I’ll mash a few beans with a spoon to naturally thicken it. Works like a charm every time!
This Dairy Queen Chili Recipe is a true comfort food classic-hearty, flavorful, and endlessly customizable. Whether you enjoy it with rice, cornbread, or simply topped with cheese and sour cream, it’s sure to be a hit at your table.
Give this recipe a try, and don’t forget to share it with friends and family. If you loved it, drop a comment below-I’d love to hear how you made it your own!
We’d love to hear how this recipe turns out for you! Give it a try, then drop a comment below to share your thoughts and tips with us.
You can also follow us on Pinterest, and YouTube for more delicious updates and kitchen inspiration. Your feedback and support mean the world to us!
3 comments